昨天看了网上一些大佬们写的教程,感觉像我这种萌新看起来很困难,昨天一天都看的晕乎乎的,睡觉的时候都还没搞清楚,今天早上动手实践了一下,按照自己的理解写了一个简单的demo。
首先是前端,前...
昨天看了网上一些大佬们写的教程,感觉像我这种萌新看起来很困难,昨天一天都看的晕乎乎的,睡觉的时候都还没搞清楚,今天早上动手实践了一下,按照自己的理解写了一个简单的demo。
首先是前端,前端就是一个表单提交账号和密码:参考代码如下
<form th:action=\"@{/login}\" method=\"post\">
				<span style=\"color: red\" th:if=\"${loginError}\" th:text=\"${loginError}\"></span>
				<input type=\"text\" class=\"text\" placeholder=\"请输入手机或者邮箱\" name=\"emailOrTelephone\"  >
				<div class=\"key\">
				<input type=\"password\" placeholder=\"请输入密码\" name=\"password\" >

				</div>
				<div class=\"signin\">
					<input type=\"submit\" value=\"登陆\" >
					<input type=\"button\" onclick=\"jump()\" value=\"注册\" >
				</div>
			</form>
后端方面:第一步先进行SpringSecurity的配置:
package com.java.myblog.config;

import com.java.myblog.service.CustomUserService;
import com.java.myblog.service.serviceImpl.CustomUserServiceImpl;
import com.java.myblog.util.MD5Utils;
import org.springframework.context.annotation.Bean;
import org.springframework.context.annotation.Configuration;
import org.springframework.security.config.annotation.authentication.builders.AuthenticationManagerBuilder;
import org.springframework.security.config.annotation.web.builders.HttpSecurity;
import org.springframework.security.config.annotation.web.configuration.EnableWebSecurity;
import org.springframework.security.config.annotation.web.configuration.WebSecurityConfigurerAdapter;
import org.springframework.security.crypto.password.PasswordEncoder;

/**
 * Created by p650se on 2018/12/21.
 */
@Configuration
@EnableWebSecurity// 注解开启Spring Security的功能
public class SecurityConfig extends WebSecurityConfigurerAdapter {
    @Override
    protected void configure(HttpSecurity http) throws Exception {
        http.authorizeRequests()  //定义哪些url需要保护,哪些url不需要保护
                //去掉不需要保护的url,去除静态资源的url,网上直接/static/**就可以,然而我不行,只能苦逼的一个个全部排出
                .antMatchers(\"/login\",\"/register\",\"/resetPwd\",\"/css/*\",\"/fonts/*\",\"/image/*\",\"/js/*\",\"/music/*\",\"/valMailSend\",\"/valsetPwdMailSend\").permitAll()    //定义不需要认证就可以访问
                .anyRequest().authenticated()
                .and()
                .formLogin()
                .loginPage(\"/\").loginProcessingUrl(\"/login\")//访问保护页面时候跳转登陆的url和申请登陆验证时候的url
                .usernameParameter(\"emailOrTelephone\").passwordParameter(\"password\")//与表单中的name要相同,不然UserLoginServiceImpl中参数没有值
                .successForwardUrl(\"/index\").failureForwardUrl(\"/login\") //定义用户登陆成功和失败的url
                .permitAll()
                .and()
                .logout()
                .permitAll();
        http.csrf().disable();//禁用csrf(跨站点请求伪造)
    }


    @Bean
    CustomUserService customUserService() { // 注册UserDetailsService 的bean

        return new CustomUserServiceImpl();
    }

    @Override
    protected void configure(AuthenticationManagerBuilder auth) throws Exception {
        auth.userDetailsService(customUserService()).passwordEncoder(new PasswordEncoder(){
            //使用MD5获取加密之后的密码
            @Override
            public String encode(CharSequence rawPassword) {
                return MD5Utils.md5((String)rawPassword);
            }
            //验证密码
            @Override
            public boolean matches(CharSequence rawPassword, String encodedPassword) {
                return encodedPassword.equals(MD5Utils.md5((String)rawPassword));
            }}); //user Details Service验证
    }
}
在下面这段代码的作用中,我还爬了一下坑,可以看我另外一篇:https://mp.csdn.net/postedit/85203620
@Bean
    CustomUserService customUserService() { // 注册UserDetailsService 的bean

        return new CustomUserServiceImpl();
    }
然后就是配置CustomUserServiceImpl,因为个人代码习惯,我习CustomUserService为接口,CustomUserServiceImpl为接口实现类。CustomUserService与CustomUserServiceImpl代码如下:
package com.java.myblog.service;


import org.springframework.security.core.userdetails.UserDetailsService;

/**
 * Created by p650se on 2018/12/21.
 */
public interface CustomUserService extends UserDetailsService{

}
package com.java.myblog.service.serviceImpl;

import com.java.myblog.entity.User;
import com.java.myblog.mapper.UserMapper;
import com.java.myblog.service.CustomUserService;
import org.slf4j.Logger;
import org.slf4j.LoggerFactory;
import org.springframework.beans.factory.annotation.Autowired;
import org.springframework.security.core.GrantedAuthority;
import org.springframework.security.core.authority.SimpleGrantedAuthority;
import org.springframework.security.core.userdetails.UserDetails;

import org.springframework.security.core.userdetails.UsernameNotFoundException;
import org.springframework.stereotype.Service;

import java.util.ArrayList;
import java.util.Collection;


/**
 * Created by p650se on 2018/12/21.
 */
@Service
public class CustomUserServiceImpl implements CustomUserService {

    @Autowired
    private UserMapper userMapper;

    private User user;

    private Logger logger = LoggerFactory.getLogger(getClass());

    @Override
    public UserDetails loadUserByUsername(String emailOrTelephone) { // 重写loadUserByUsername 方法获得 userdetails  类型用户
        logger.info(\"用户名:\" + emailOrTelephone);
        user=null;

        if(emailOrTelephone.matches(\"0?(13|14|15|18|17)[0-9]{9}\")){
             user = userMapper.selectByTelephone(emailOrTelephone);
        }else{
             user = userMapper.selectByEmail(emailOrTelephone);
        }
        if (user == null) {
            throw new UsernameNotFoundException(\"用户名不存在\");
        }
        //第一个参数String类型,第二个参数是数据库中的密码,第三个是授权信息。
        return new org.springframework.security.core.userdetails.User(user.getUserName(), user.getUserPassword(), getAuthorities(user.getUserLevel()));
    }
    /**
     * 获得访问角色权限, 用于添加用户的权限。只要把用户权限添加到authorities 就万事大吉。
     */
    public Collection<GrantedAuthority> getAuthorities(String level) {

        Collection<GrantedAuthority> authorities = new ArrayList<>();

        //所有的用户默认拥有ROLE_USER权限
        authorities.add(new SimpleGrantedAuthority(\"USER\"));
        if (level.equals(\"admin\")) {
            // 如果参数access为0.则拥有ROLE_ADMIN权限
            authorities.add(new SimpleGrantedAuthority(\"ADMIN\"));
        }
        return authorities;
    }
}
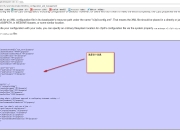
数据表设计如下 。
。
版权声明
本文仅代表作者观点,不代表百度立场。
本文系作者授权百度百家发表,未经许可,不得转载。