前期工作可参阅:
1.python work2vec词向量训练可参考 https://blog.csdn.net/shuihupo/article/details/85156544词向量训练
2.wor...
前期工作可参阅:
1.python work2vec词向量训练可参考 https://blog.csdn.net/shuihupo/article/details/85156544词向量训练
2.word2vec词向量中文语料处理(python gensim word2vec总结) 可参考 https://mp.csdn.net/postedit/85162237汇总数种语料加载方式。
之前的博客讲的比较详细,这篇博客则直接上例子了,有疑问的翻看之前的语料处理和词向量训练。
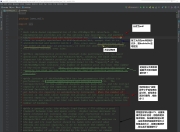
python训练work2vec词向量实例
word2vec中文语料处理及模型训练实践
(实践部分代码改编自链接)原始小说语料下载《人民的名义》
将代码中路径改为小说文本存放路径
#!/Mypython python3.5
# -*- coding: utf-8 -*-
# @Time    : 2018/12/21 16:49
# @Author  : LinYimeng
# @Site   :
# @File   : word2vec_test.py
# @Software: PyCharm
import multiprocessing
import jieba
import jieba.analyse
from gensim.test.utils import common_texts, get_tmpfile
from gensim.models import Word2Vec
with open(\'C:\\\\Users\\Administrator\\Desktop\\\\in_the_name_of_people\\in_the_name_of_people.txt\',encoding=\'utf-8\') as f:
    document = f.read()
    document_cut = jieba.cut(document)
    result = \' \'.join(document_cut)
    print(\"type\",type(result))
    with open(\'./in_the_name_of_people_segment.txt\', \'w\',encoding=\"utf-8\") as f2:
        f2.write(result)

# import logging
import os
from gensim.models import word2vec

# logging.basicConfig(format=\'%(asctime)s : %(levelname)s : %(message)s\', level=logging.INFO)

sentences = word2vec.LineSentence(\'./in_the_name_of_people_segment.txt\')
path = get_tmpfile(\"word2vec.model\") #创建临时文件
model = Word2Vec(sentences, size=200, window=5, min_count=1,
                 workers=multiprocessing.cpu_count())
path = get_tmpfile(\"w2v_model.bin\") #创建临时文件
path1 = get_tmpfile(\"w2v_vector.bin\") #创建临时文件
model.save(\"w2v_model.bin\")
model.wv.save(\"w2v_vector.bin\")
for key in model.wv.similar_by_word(\'人民\', topn =10):
    print(key)
#for key in model.similar_by_word(\'人民\',topn=10):
#        print(key)

(\'钱\', 0.9998364448547363)
(\'但\', 0.9998363256454468)
(\'倒\', 0.9998291730880737)
(\'以后\', 0.99982750415802)
(\'回来\', 0.9998223185539246)
(\'工作\', 0.999817967414856)
(\'赵家\', 0.9998155236244202)
(\'赵瑞龙\', 0.9998130798339844)
(\'打\', 0.9998125433921814)
(\'一次\', 0.9998101592063904)
版权声明
本文仅代表作者观点,不代表百度立场。
本文系作者授权百度百家发表,未经许可,不得转载。