在上一节中,咱们学习了Vue中怎么创建组件。在这篇文章中我们以按钮组件为例,了解了怎么注册全局组件和局部组件。并且通过这些基础知识,可以轻易的创建类似于HTML中button元素效果的按钮组件。但这个组件非常的简陋,和我们想像的组件相差甚远。那么今天我们来看看,怎么在Vue中创建一个按钮组件。
以Bootstrap的按钮为例
很多人说Bootstrap很拙逼,灵活性不够。但我不这么认为,我是Bootstrap的粉丝,我一直很推崇Bootstrap。并不是因为其效果有多牛逼,我膜拜的是他的设计思想。别的不多说了,今天我们的目的是使用Vue来创建一个按钮组件。那么我们就用Bootstrap的按钮来举例。在Bootstrap中的按钮分为Buttons和Button组两个组件,今天先来看Buttons组件。
先来简单的回忆Bootstrap的Buttons组件,其效果和使用方式如下:
咱们先看看Vue怎么来写button组件。
创建按钮组件
通过前面的对Bootstrap组件的分析,可以得知,创建button组件时,其对应的props属性将会有btnText、btnSize、btnType、btnOutline、btnActive和btnBlock。而在上一节中,我们知道怎么注册组件。那么接下来,直接使用注册组件的语法糖来创建。
Vue.component('vue-button', { props: [
'btnText', // 按钮文本内容 'btnType', // 按钮类型 'btnSize', // 按钮尺寸大小 'btnOutline', // 只有边框的按钮样式 'btnActive', // 按钮状态,是一个布尔值,true表示激活(当前状态) 'btnBlock' // 按钮是不是块元素,是一个布遥值,true表示块元素 ], template: ` <button type="button" class="btn" :class='[computedType, computedSize, computedOutline, computedActive, computedBlock]' >{{ btnText }}</button> `, computed: {
// 控制按钮的类型 computedType: function () { return `btn-${this.btnType}` },
// 控制按钮大小尺寸 computedSize: function () { return `btn-${this.btnSize}` },
// 控制按钮边框 computedOutline: function () { return `btn-outline-${this.btnOutline}` },
// 控制按钮是否激活 computedActive: function () { return this.btnActive === 'true' ? 'active' : '' },
// 控制按钮是否是块元素 computedBlock: function () { return this.btnBlock === 'true' ? 'btn-block' : '' } } })
上面的代码其实表示我们已经完成了按钮组件的注册,在继续往下之前,先试着了解已经完成的工作:
使用Vue.component(tagName, options)注册了一个button组件,这个组件的标签为vue-button;并且在这个组件中设置了props、computed两个选项给props属性设置了一个数组,数组中的值为btnText、btnSize、btnType、btnOutline、btnActive和btnBlock,这些都是我们控制按钮想要的属性,而这些属性都是来自Bootstrap的类(熟悉Bootstrap的同学一目了然)在computed中对属性值进行计算,以便正确的类可以用到模板中。你也看到了类的实现,使用的是数组的形式。有关于样式怎么绑定到Vue的组件中,可以点击这里进行了解计算值在将类追回到类数组中起主要作用,并根据对应的类获取所需要的样式,呈现对应的外观
这个例子让我对计算属性(computed)和如何在计算值时考虑到组件的避性以及数据块的属性有了一个更好的理解。在Vue中,除了使用computed之外,还可以使用方法(methods)和观察者(watch)。具本使用哪一种方式,可以根据自己的需求和应用场景来决定。如果你想了解这三者的不同之处,可以点击这里进行了解。
使用按钮组件
组件已经注册OK了,现在可以在Vue的实例中使用该组件。
[xml] view plain copy
<div id="app"> <div class="container"> <div class="block"> <vue-button btn-text="Primary" btn-type="primary"></vue-button> <vue-button btn-text="Secondary" btn-type="secondary"></vue-button> <vue-button btn-text="Success" btn-type="success"></vue-button> <vue-button btn-text="Danger" btn-type="danger"></vue-button> <vue-button btn-text="Warning" btn-type="warning"></vue-button> <vue-button btn-text="Info" btn-type="info"></vue-button> <vue-button btn-text="Light" btn-type="light"></vue-button> <vue-button btn-text="Dark" btn-type="dark"></vue-button> <vue-button btn-text="Link" btn-type="link"></vue-button> </div> <div class="block"> <vue-button btn-text="Primary" btn-outline="primary"></vue-button> <vue-button btn-text="Secondary"btn-outline="secondary"></vue-button> <vue-button btn-text="Success" btn-outline="success"></vue-button> <vue-button btn-text="Danger" btn-outline="danger"></vue-button> <vue-button btn-text="Warning" btn-outline="warning"></vue-button> <vue-button btn-text="Info" btn-outline="info"></vue-button> <vue-button btn-text="Light" btn-outline="light"></vue-button> <vue-button btn-text="Dark" btn-outline="dark"></vue-button> <vue-button btn-text="Link" btn-outline="link"></vue-button> </div> <div class="block"> <vue-button btn-text="Large button" btn-type="primary" btn-size="lg"></vue-button> <vue-button btn-text="Default button" btn-type="primary"></vue-button> <vue-button btn-text="Small button" btn-type="primary" btn-size="sm"></vue-button> </div> <div class="block"> <vue-button btn-text="Large block button" btn-type="primary" btn-size="lg" btn-block=true></vue-button> <vue-button btn-text="Small block button" btn-type="primary" btn-size="sm" btn-block=true></vue-button> </div> <div class="block"> <vue-button btn-text="Primary" btn-type="primary" btn-size="lg" btn-active=true></vue-button> </div> </div>
</div>
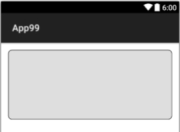
没有样式的时候,效果如下:
看上去没有任何差别。这个时候把Bootstrap的样式代码添加进来,你可以只引入button部分的样式。这个时候你看到的效果如下:
除了上述的方式之外,也可以在使用的时候,通过data来传相应的参数,比如:
data: {
buttonLabel: “Login”, buttonType:“primary”, bigButton:{ label:“Big Button Label”, type:“warning”, size:“lg”, active:“true”, block:“true” }}
在app的Vue实例中:
[xml] view plain copy
<vue-button :btn-text=“buttonLabel” :btn-type=“buttonType”></vue-button>
<vue-button :btn-text=“bigButton.label” :btn-type=“bigButton.type” :btn-size=“bigButton.size” :btn-active=“bigButton.active” :btn-block=“bigButton.block”></vue-button>
效果如下:
不过上面的按钮并不完美,查看前面的Demo的源码,我们不难发现,有些类名会是这样:
有很多的undefined出现在class中。对于追求完美的同学而言,似乎无法接受。接下来尝试一下对其进行修正。
Vue.component('vue-button', { props: [
'btnText', // 按钮文本内容 'btnType', // 按钮类型 'btnSize', // 按钮尺寸大小 'btnOutline', // 只有边框的按钮样式 'btnActive', // 按钮状态,是一个布尔值,true表示激活(当前状态) 'btnBlock' // 按钮是不是块元素,是一个布遥值,true表示块元素 ], template: ` <button type="button" class="btn" :class='[computedType, computedSize, computedOutline, computedActive, computedBlock]' >{{ btnText }}</button> `, computed: {
// 控制按钮的类型 computedType: function () { return this.btnType ? `btn-${this.btnType}` : '' },
// 控制按钮大小尺寸 computedSize: function () { return this.btnSize ? `btn-${this.btnSize}` : '' },
// 控制按钮边框 computedOutline: function () { return this.btnOutline ? `btn-outline-${this.btnOutline}` : '' },
// 控制按钮是否激活 computedActive: function () { return this.btnActive === 'true' ? 'active' : '' },
// 控制按钮是否是块元素 computedBlock: function () { return this.btnBlock === 'true' ? 'btn-block' : '' } } })
在btnType、btnSize和btnOutline加了一个判断,如果没有传值,将会返回''。这样一来就不会在class中出现类似btn-underfinde这样的类名了。

最终看到的效果是一致的。
单文件创建按钮组件
除此之外,咱位还可以单文件来创建组件。这里我们使用Vue-cli的方式来创建。有关于Vue-cli的操作,这里不详细阐述了,感兴趣的可以点击这里阅读。
在src/components/目录下创建Button.vue文件,其实就是button组件所需要的内容。在单个文件中创建一个组件,主要包括:
[xml] view plain copy
<template></template>
<script></script>
<style></style>
其中<template>对应的是button中所需要的模板内容,<script>是组件中的JavaScript代码,而<style>则是组件需要的样式。比如我们所要的Bootstrap 4的按钮组件,可以这样写:
[xml] view plain copy
<template> <button type="button" class="btn" :class='[computedType, computedSize, computedOutline, computedActive, computedBlock]' >{{ btnText }}</button>
</template>
<script>
export default { name: 'Button', props: { btnText: { type: String,
default: '' }, btnType: { type: String,
default: '' }, btnSize: { type: String,
default: '' }, btnOutline: { type: String,
default: '' }, btnActive: { }, btnBlock: { } }, computed: {
// 控制按钮的类型 computedType: function () { return this.btnType ? `btn-${this.btnType}` : '' },
// 控制按钮大小尺寸 computedSize: function () { return this.btnSize ? `btn-${this.btnSize}` : '' },
// 控制按钮边框 computedOutline: function () { return this.btnOutline ? `btn-outline-${this.btnOutline}` : '' },
// 控制按钮是否激活 computedActive: function () { return this.btnActive === 'true' ? 'active' : '' },
// 控制按钮是否是块元素 computedBlock: function () { return this.btnBlock === 'true' ? 'btn-block' : '' } } }
</script>
<style scoped>
/*引入bootstrap.css中的button.css*/
.btn {
display: inline-block; font-weight: 400; ...
</style>
接下来就可以这样调用Button.vue组件。比如在App.vue中:
[xml] view plain copy
<template> <div id="app"> <div class="container"> <div class="block"> <vue-button btn-text="Primary" btn-type="primary"></vue-button> <vue-button btn-text="Secondary" btn-type="secondary"></vue-button> <vue-button btn-text="Success" btn-type="success"></vue-button> <vue-button btn-text="Danger" btn-type="danger"></vue-button> <vue-button btn-text="Warning" btn-type="warning"></vue-button> <vue-button btn-text="Info" btn-type="info"></vue-button> <vue-button btn-text="Light" btn-type="light"></vue-button> <vue-button btn-text="Dark" btn-type="dark"></vue-button> <vue-button btn-text="Link" btn-type="link"></vue-button> </div> <div class="block"> <vue-button btn-text="Primary" btn-outline="primary"></vue-button> <vue-button btn-text="Secondary" btn-outline="secondary"></vue-button> <vue-button btn-text="Success" btn-outline="success"></vue-button> <vue-button btn-text="Danger" btn-outline="danger"></vue-button> <vue-button btn-text="Warning" btn-outline="warning"></vue-button> <vue-button btn-text="Info" btn-outline="info"></vue-button> <vue-button btn-text="Light" btn-outline="light"></vue-button> <vue-button btn-text="Dark" btn-outline="dark"></vue-button> <vue-button btn-text="Link" btn-outline="link"></vue-button> </div> <div class="block"> <vue-buttonbtn-text="Large button" btn-type="primary" btn-size="lg"></vue-button> <vue-button btn-text="Default button" btn-type="primary"></vue-button> <vue-button btn-text="Small button" btn-type="primary"btn-size="sm"></vue-button> </div> <div class="block"> <vue-button btn-text="Large block button" btn-type="primary" btn-size="lg" btn-block="true"></vue-button> <vue-button btn-text="Small block button" btn-type="primary" btn-size="sm" btn-block="true"></vue-button> </div> <div class="block"> <vue-button btn-text="Primary" btn-type="primary" btn-size="lg" btn-active="true"></vue-button> </div> </div> </div>
</template>
<script>
import vueButton from "./components/Button"; export default { name: "App", components: { vueButton } };
</script>
最终你能看到的效果如下:
有关于源码可以点击这里获取。另外有关于Vue学习的示例代码,都将放在Github的VueStudy仓库,感兴趣的可以点击这里获取自己感兴趣的东西。如果你有兴趣,也可以将你的示例代码提交到这个库,与大家一起分享。
总结
在组件使用一文中,我们了解了在Vue中怎么注册全局和局部组件,以及怎么使用注册好的组件。为了巩固前面学习内容,这篇文章我个通过创建Bootstrap4中的button组件为例,看看在Vue中怎么创建组件,以及使用组件。
由于本人是Vue的初学者,如果文中有不对之处,还请各路大神拍正。如果你有更好的建议或经验欢迎在下面的评论中与我们一起分享。
原文发布时间:2018年02月05日
原文作者:W3cplus_
本文来源csdn如需转载请紧急联系作者
版权声明
本文仅代表作者观点,不代表百度立场。
本文系作者授权百度百家发表,未经许可,不得转载。